A tour of the administration
This page walks once around the screen of the administration, so you know where things are. It shows the Admin 4 design. What you see depends on your role: an editor may see only Dashboard, Content structure and Media in the top menu, an administrator sees more.
Not signed in yet? See Logging into the admin or, for editors, Logging into the Editor.
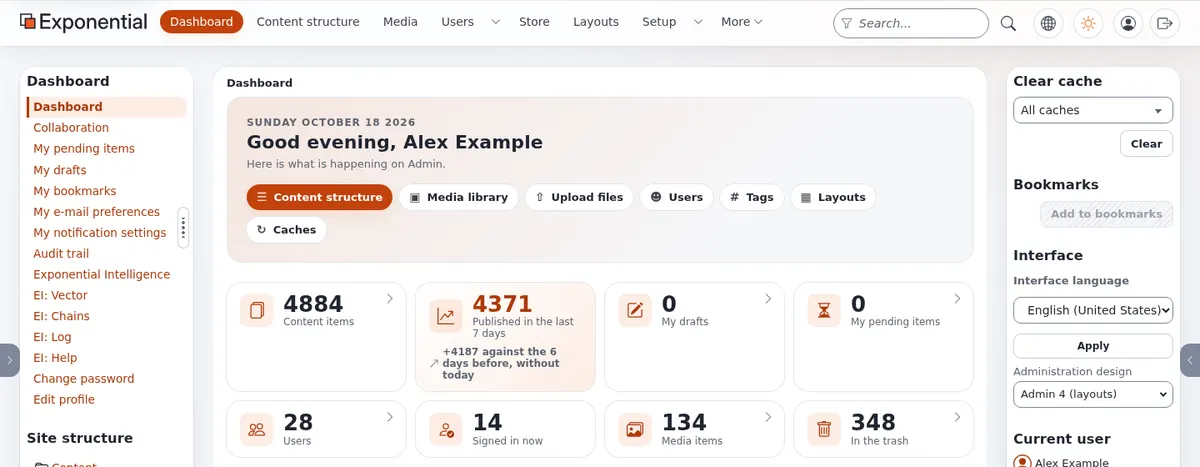
The header
From left to right:
| Part | What it does |
|---|---|
| Exponential logo | Back to the dashboard, or to the top of the content when your role has no dashboard. |
| The tabs | Dashboard, Content structure, Media, Users, Layouts, Setup and more, depending on your role and the extensions of the site. Tabs that do not fit move under More. A small arrow next to a tab opens its menu of sub-pages. |
| Search... | Searches all content. The funnel button in the field (Search scope) limits the search to a section or to the current place in the tree, and leads to the Advanced search. Press / anywhere to jump to this field. See Searching. |
| Globe button | Open the site or another siteaccess: opens the public site, or another part of the installation, in the same way the site's visitors see it. |
| Sun button | Color mode: switches between light, dark and the mode of your computer's system. Each press moves to the next mode; the choice is remembered for your account. |
| Person button | User menu: your name (opens your own user item), Change information, Change password, My e-mail preferences. |
| Arrow leaving a box | Logout. |
On a narrow screen (a phone, or a window made small) the tabs and the search move into a menu behind the button with three lines.

The left column
The left column changes with the tab:
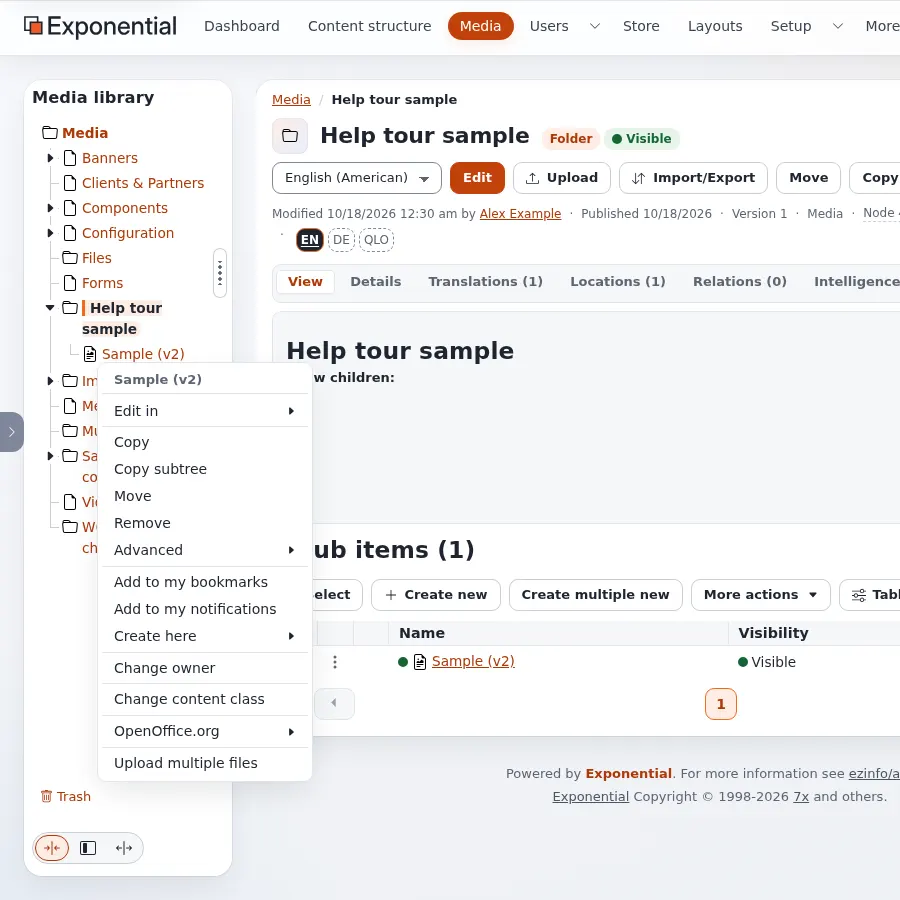
- In Content structure and Media it holds the tree: click the small triangle to open a folder, click a name to open the item. Click the icon in front of a name to open the item's menu (edit, copy, move, remove, create here, add to bookmarks and more). Trash is at the bottom of the tree.
- Below the tree, the Content finder opens an item from its number (ID), its path or its address on the site: type it and press Find.
- On the dashboard it lists your own pages: Recent content (second, after Dashboard, for moderators: the newest content of the whole site, what is held for review, who submitted it, and actions on a selection; Recent content), My pending items, My drafts, My bookmarks, My e-mail preferences, My notification settings, Change password, Edit profile and more.
- In Setup it lists the pages of the setup in groups, each shown only to roles that may open it. One of them is Migrations in the group System: the migrations of the installation, their runs, a run or a rollback started in the background, and the log of each run (Migrations in the administration; what migrations are, for administrators: Migrations for administrators; everything else: Migrations). Next to Cache in the same group, Static publishing publishes a static copy of a site to GitHub Pages or any other host of repositories: a target made with a wizard, a build in the background, the changes checked before Publish, and every publish kept to go back to (Static publishing).
The right column
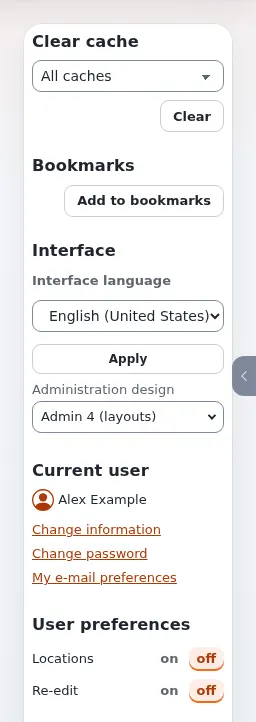
The right column holds small tools for you:
- Clear cache: for administrators; editors usually do not need it.
- Bookmarks: your bookmarked items, and Add to bookmarks for the item you are looking at.
- Interface: the Interface language of the administration and, when allowed, the Administration design. See Languages.
- Current user: your name, with links to change your information and your password.
- User preferences and Quick settings: switches that change how pages are shown to you. Only some roles see them.
Hiding and resizing the columns
The tabs at the left and right edges of the window (with a small arrow) hide or show the left and right column. In the left column the handle with three dots can be dragged to make the column wider or narrower; with the keyboard, focus it and use the arrow keys. The buttons at the bottom of the left column set a small, medium or large width. The administration remembers your choice.
The dashboard
The dashboard is the first page after signing in. From the top:
- A greeting and quick actions: buttons to the places you need most, such as Content structure, Media library and Upload files.
- Numbers: content items, items published in the last seven days, My drafts, My pending items, and more for administrators. Click a number to open its list.
- Publishing, last 14 days: a small chart; Show the numbers shows it as a table.
- My pending items, My drafts, All latest content and My latest content: short lists that lead to the items.
Administrators also see blocks about the system, updates and security events, and the Migrations block: how many migrations are pending or failed, the orphans (recorded, their file gone), the last run with its state, a note while a run is going on, and All migrations, a link to Setup > Migrations. The block shows only to users who may see the migrations (The dashboard block). Moderators see the Recent content block: how many items are held for review and how many were created today, each a link to the list filtered on them. The Static publishing block lists each target with its stale pages and its last publish; before the first target it is one line with links to the wizard and the tutorial, and hide this removes it for you (Static publishing).

An item's page
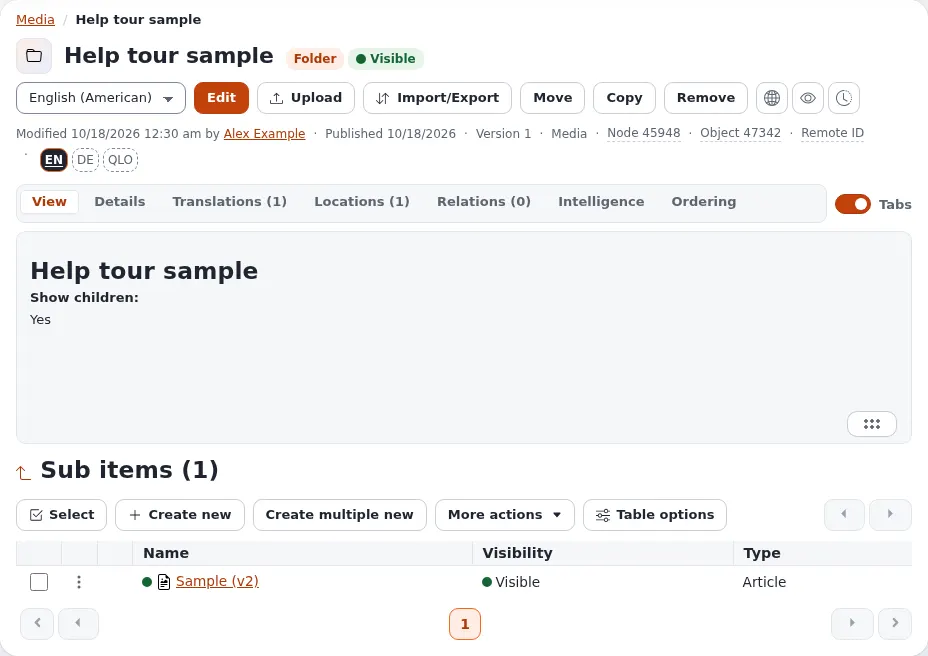
When you open an item, its page shows:
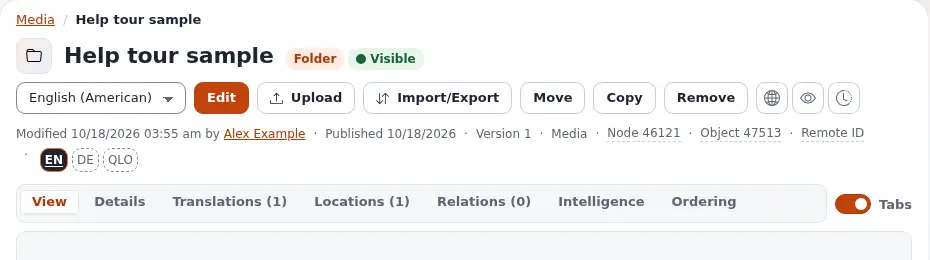
- the path to it at the top (click a part to go up), its name, its type (such as Folder or Article) and whether it is visible on the site;
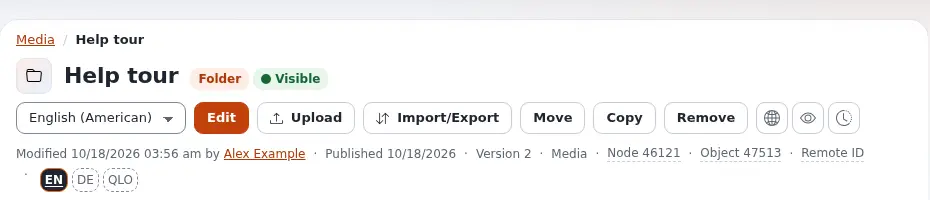
- the buttons: a language list and Edit, Upload, Move, Copy, Remove, and three round buttons: View on site, Preview and Manage versions;
- a line with when it was changed, by whom, its version and its numbers (Node, Object);
- tabs with more about the item: View (its content), Details, Translations, Locations, Relations and others. The Tabs switch turns the tabs into one long page and back;
- Sub items: the items below it, with buttons to Create new, select, sort and act on several at once.

In action: editing a folder
This walk-through edits a folder from start to finish. Every other content type works the same way; only the fields differ. Creating and editing content and Publishing, versions and the trash explain each step in more depth.
1. Open the editor
Open the folder (from the tree, a list or a search) and press Edit next to the language list. If the folder exists in several languages, choose the language in that list first.
2. The edit form
The form opens with a new draft, a copy of the published version. The site keeps showing the published version until you publish.
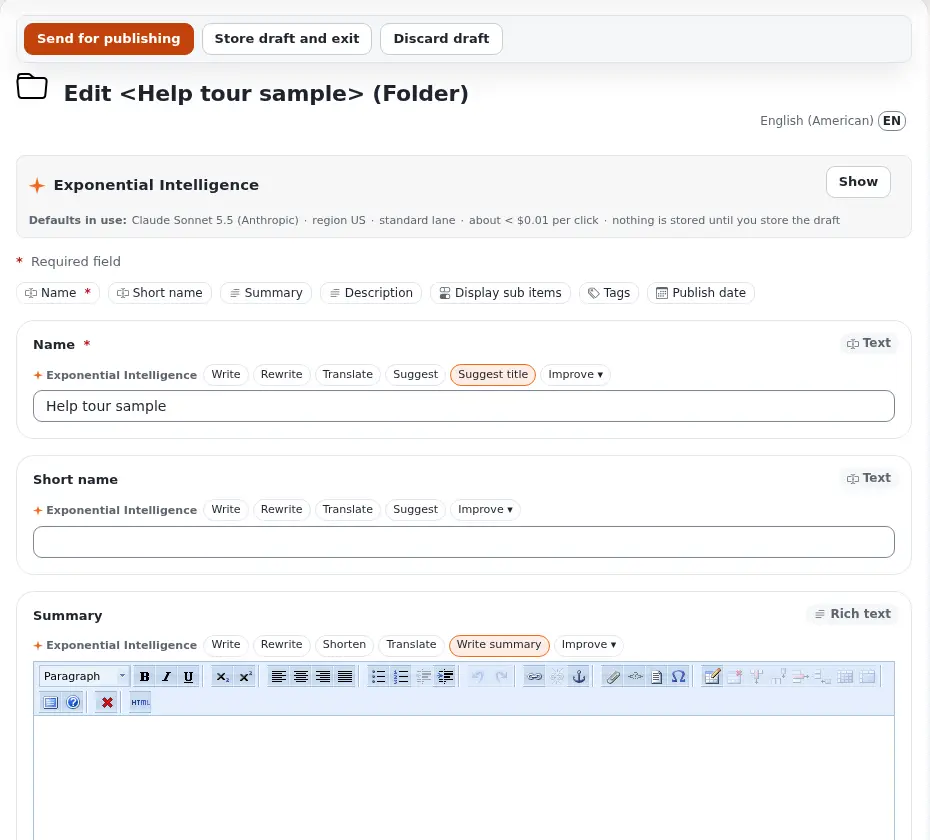
From the top:
- the buttons Send for publishing, Store draft and exit and Discard draft;
- the title Edit <name> (Folder) and the language you edit, here English (American);
- the Exponential Intelligence box, when the writing assistant is switched on;
- the field bar: one button per field (Name, Short name, Summary, Description, Display sub items,
Tags, Publish date), each jumping to its card; a red
*marks a required field; - one card per field, with its kind in the corner (Text, Rich text ...).
A folder's fields:
| Field | What to put in it |
|---|---|
| Name (required) | The folder's name, as shown on the site and in the tree. |
| Short name | A shorter name for menus and the tree; when it is filled in, it is used as the item's name in lists. |
| Summary | A short introduction, in rich text. |
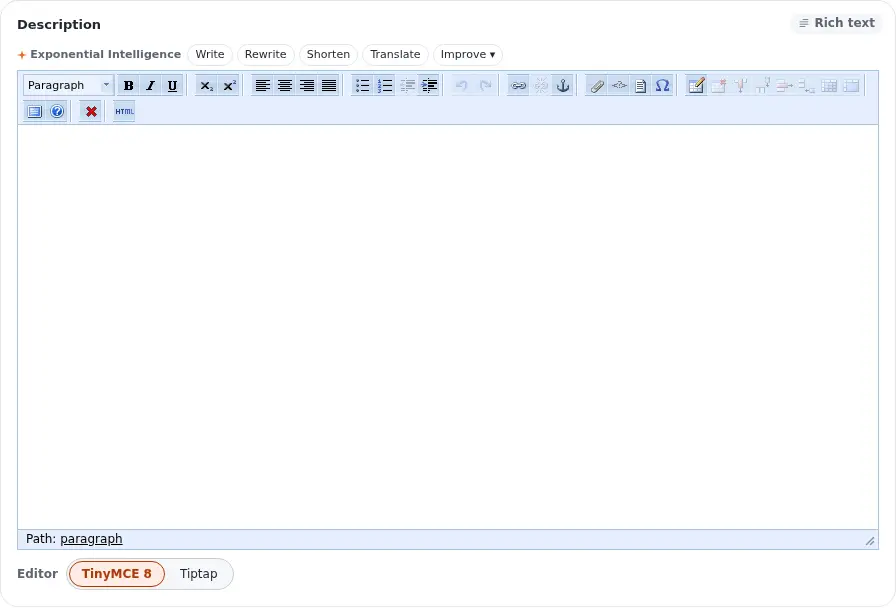
| Description | The full text, in rich text. |
| Display sub items | Whether the site lists the items in the folder below its text. |
| Tags, Publish date | Keywords, and the date shown as the publication date. |
3. Rich text
Summary and Description use the online editor. Its toolbar has the paragraph style list, bold, italic and underline, subscript and superscript, alignment, lists and indents, undo and redo, links and anchors, embedded objects, custom tags, special characters, tables, and buttons for help and the HTML source. Below the field, Editor switches between the editors your site offers; on this installation TinyMCE 8 is the default and Tiptap is the alternative. Switching keeps what you typed.
4. Keep it as a draft
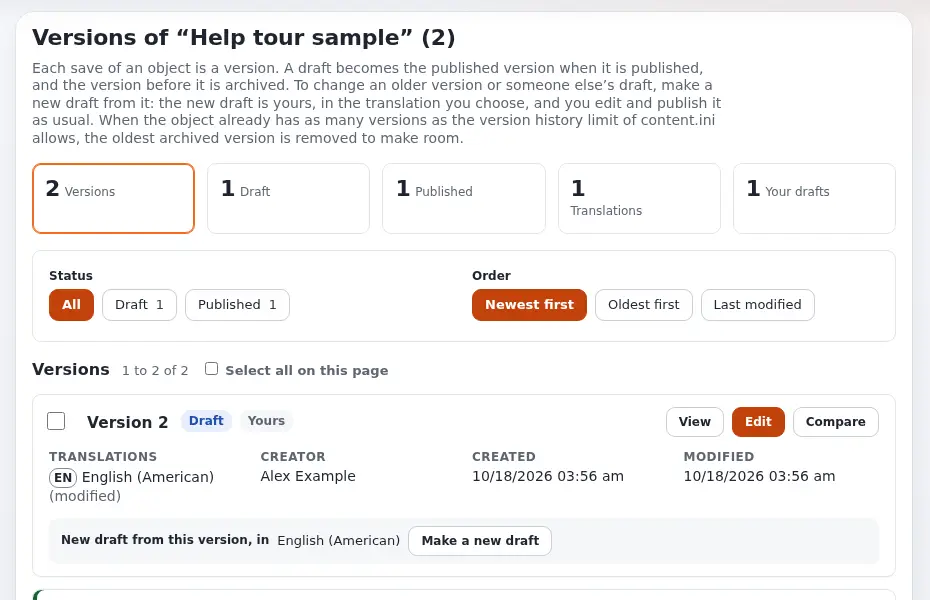
Not finished? Press Store draft and exit. The draft is kept, only you see it, and it waits under My drafts. The form also saves the draft by itself every few minutes. The left column of the form shows the published version and Current draft, the version you are working on.
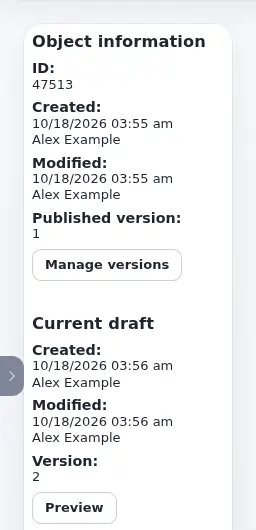
To continue later, open My drafts on the dashboard, or Manage versions on the item, and press Edit on your draft.
5. Preview
Preview in the form's left column (or View on a draft in the versions page) shows the draft as the site will show it. The buttons at the top show it at the width of a phone, a tablet, a desktop or a large desktop; Back to edit returns to the form, and Publish publishes from there.

6. Publish
Press Send for publishing. The draft becomes the published version, and the version before it is kept as an archived version. The item's page shows the new version number; here the folder is now called by its short name.
If your site uses an approval, the version waits under My pending items until someone approves it.
7. Versions and going back
Manage versions (the round button with a clock) lists every version. View and Compare show what changed; Make a new draft starts a draft from an older version, which you then publish as usual. See Go back to an earlier version.
8. Discard
Started a draft you do not want? Press Discard draft and confirm. The draft is thrown away; the published version stays exactly as it was.
In action: the layouts editor
Pages built with Exponential Layouts are arranged in the layouts editor. This walk-through uses a copy of a layout, so nothing on the site changes. The layouts editor explains each part in more depth.
1. Open a layout
In the Layouts tab, open Layouts and press Open on a layout. The editor opens on a draft of it: what you change stays in the draft, saved as you go, until you publish.
2. Zones and blocks
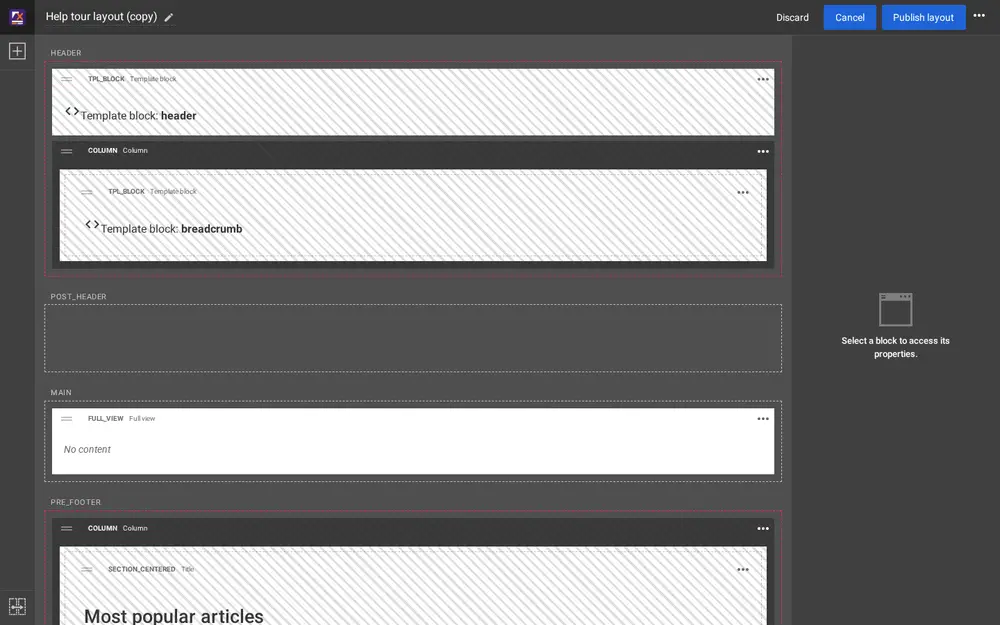
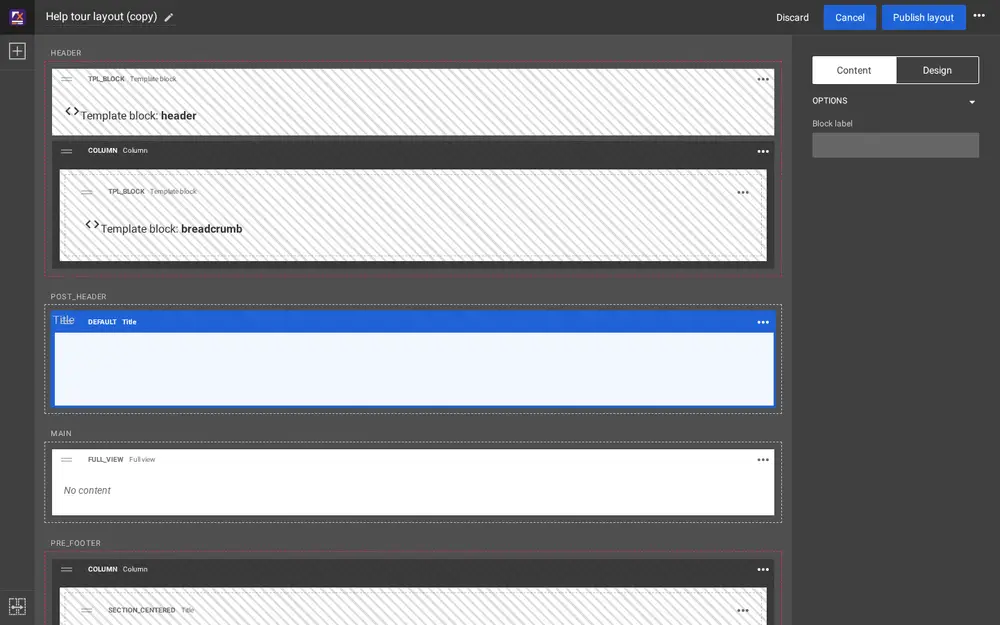
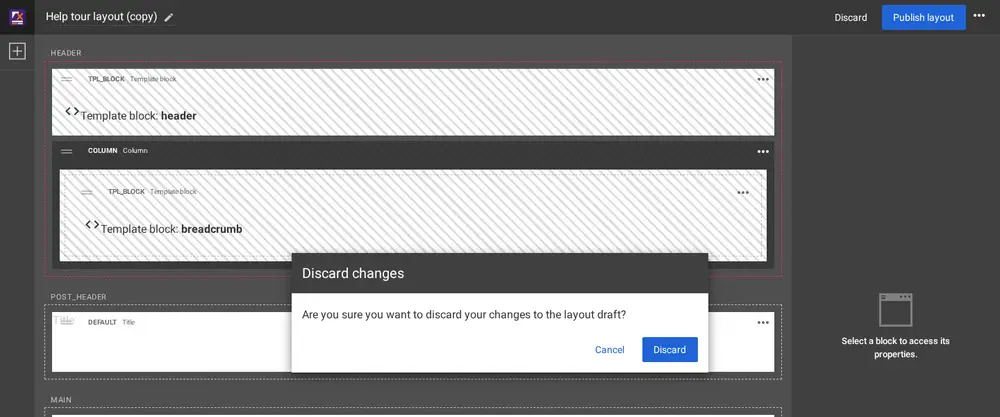
The middle shows the layout's zones, each with its name (HEADER, POST_HEADER, MAIN, PRE_FOOTER ...), and in each zone its blocks, one under the other. Each block shows its type (Template block, Column, Full view, Title ...) and a preview of what it shows. A zone with a red dashed border and hatched blocks is linked to a zone of a shared layout (see step 6).
3. Block settings
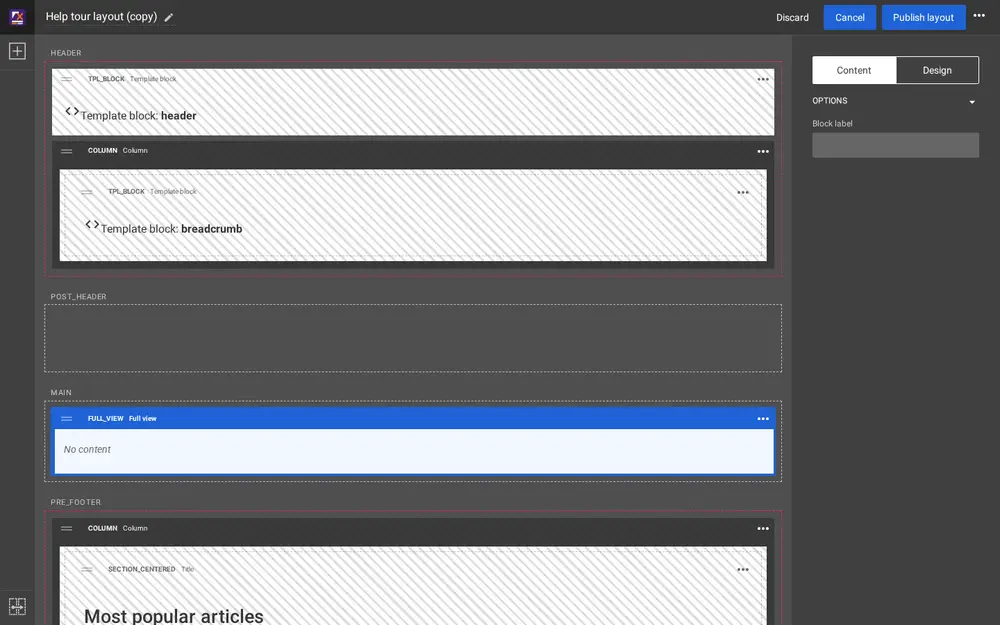
Click a block to select it. It is outlined in blue, and its settings appear on the right in two tabs: Content (what it shows) and Design (how it looks). Changes show in the block at once.
4. Add a block
Press the plus button at the top left (Add a block), find the block type in its group (Basic, Components, Listing, Gallery, Containers, Placeholders) and drag it into a zone. Here a Title block was dragged into the empty POST_HEADER zone; it is selected, ready for its settings.
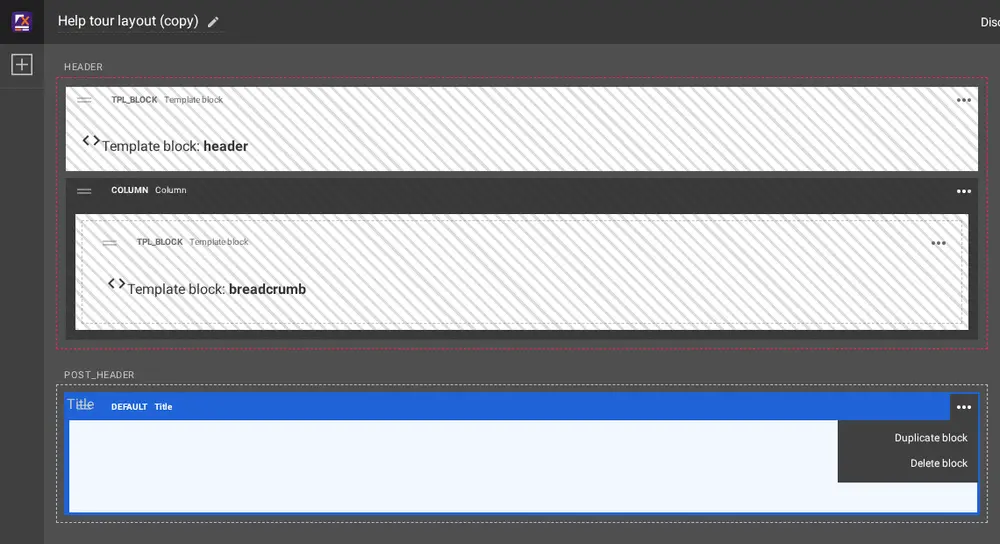
The menu with three dots on a block has Duplicate block and Delete block.
5. Move a block
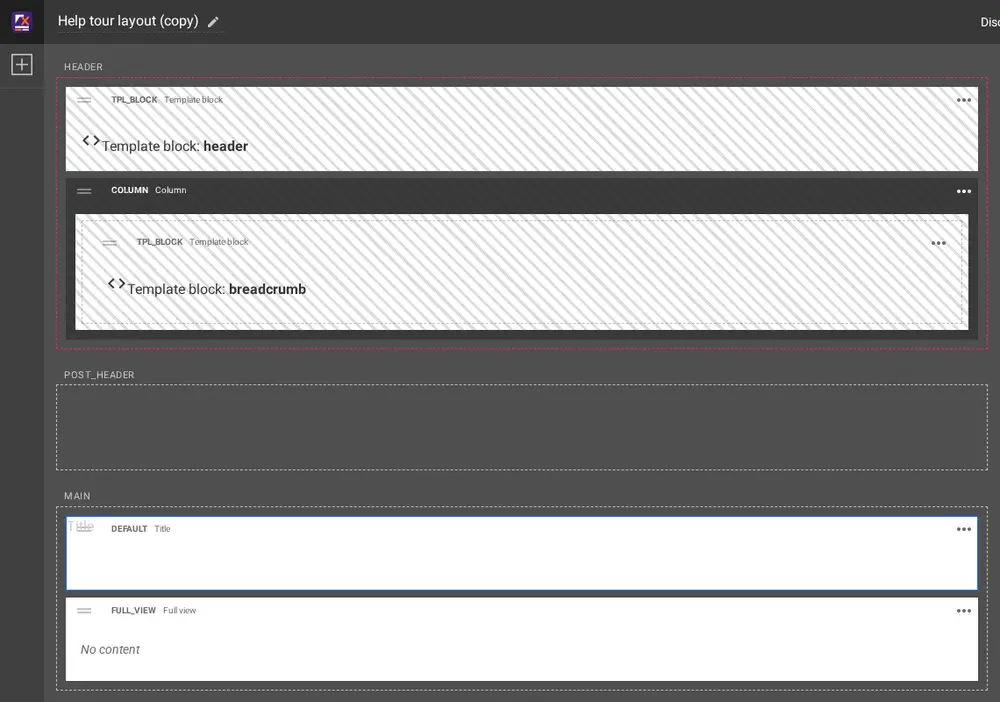
Drag a block by its header bar to another place, in the same zone or another one. Here the Title block was moved into MAIN, above the Full view block.
6. Linked and shared zones
A shared layout holds blocks that many pages use, such as the header and the footer. Instead of copying those blocks, a zone is linked to a zone of the shared layout and shows its blocks. Linked blocks cannot be changed in the linking layout; change them by opening the shared layout itself.
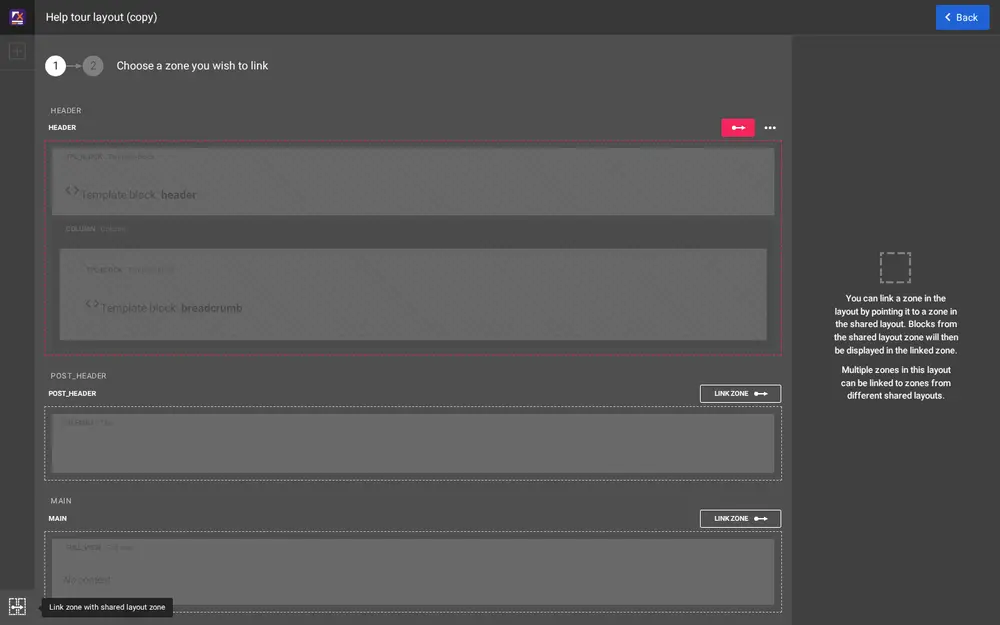
The button at the bottom left (Link zone with shared layout zone) opens the linking mode: step 1 asks for the zone you wish to link (Link zone on each zone; a linked zone shows a red link button), step 2 for the shared layout and its zone. Back returns to the editor.
7. Draft or publish
| Button | What it does |
|---|---|
| Publish layout | The draft becomes the published layout; every page that uses it shows the change. |
| Publish and continue editing (menu with three dots) | Publishes and keeps the editor open. |
| Save draft and close (menu with three dots) | Keeps the draft for later; the site keeps the published layout. |
| Discard | Throws the draft away after you confirm in the Discard changes dialog; Cancel in the dialog keeps it. |
Which pages use a layout is decided by its mappings; see Which pages use a layout.
Demo mode. On a public demonstration site every page of the administration starts with a yellow Demo mode banner. It means anyone may know the administrator password and that it cannot be changed there; do not enter anything private. Demo mode.
Next steps
Curious how the administration is made, or want to change your site's templates and code? Every part of Exponential is free software with its full history on GitHub. Develop with Git shows how to install it as Git clones and grow from user to developer, one step at a time.
See also: Database Administrators.
Become an Exponential Partner
Partners share their information, provide funding, contribute back and develop the products with us, and that is how Exponential grows. A partner website and dashboard are planned for mid-2027: please become a partner today to speed up our growth rate and land new features faster.