Lesson 3.1: Creating your first folder
A folder is the simplest content item and the one every editor creates first: it is where their articles will go. In this lesson learners create a personal folder for the rest of the course, meet the edit form for the first time and publish.
Note
Every learner creates their own folder, named after themselves. All later exercises of this course happen inside it, so learners never change each other's work.
At a glance
| Course | Editors 101 |
| Module | Module 3: Creating and editing content |
| Duration | 45 minutes (15 presenting, 30 exercise) |
| Level | Beginner |
| Audience | New editors and authors |
| Prerequisites | Module 2; a training account that may create folders in the training area |
Learning objectives
After this lesson, learners can:
- create a new item below a chosen place with Create new in the Sub items list or Create here in the item menu;
- name the three buttons at the top of the edit form and what each does;
- fill in the fields of a folder, including the required Name;
- publish the folder with Send for publishing and find it in the tree.
Trainer's notes
Preparing
Create one folder named Training (or similar) on the training site and give the learners' role permission to create folders and articles below it. Test the permission with one learner account before the class.
How to present it
Source: Creating and editing content and In action: editing a folder.
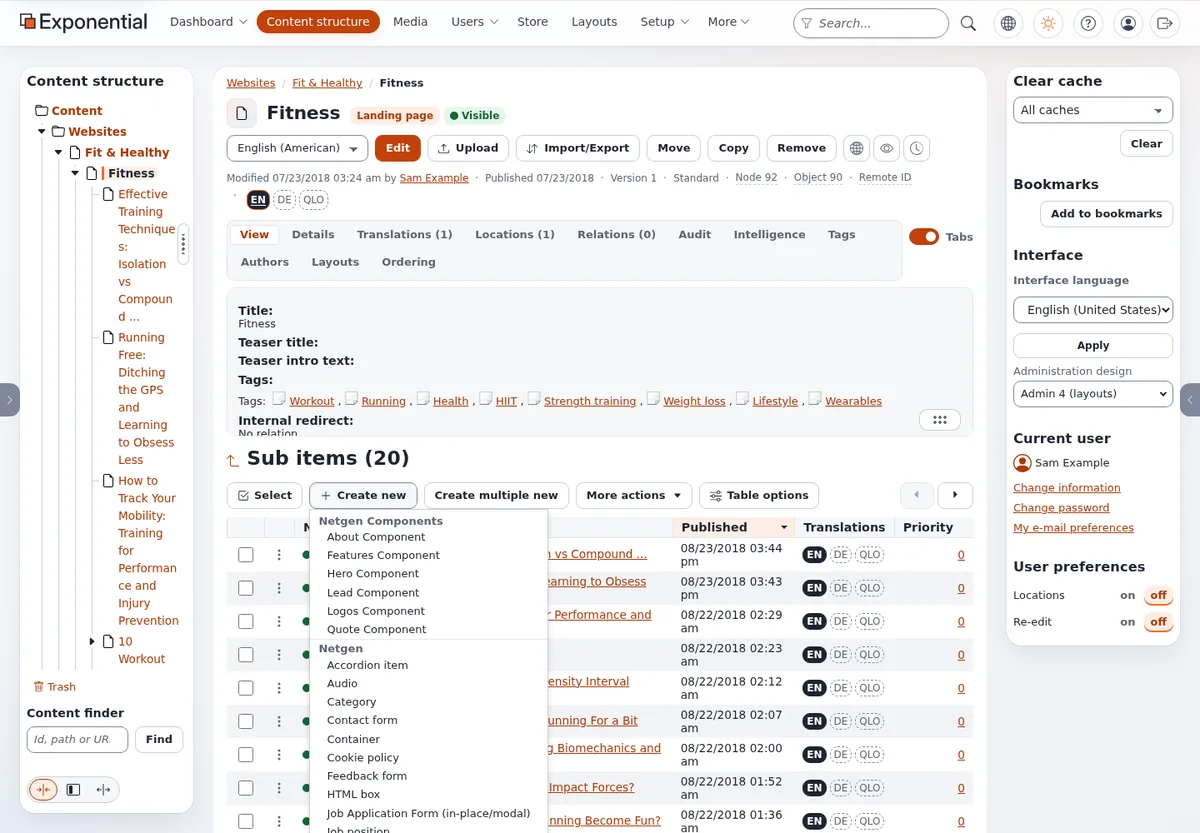
- Where the item goes (2 minutes). Open the Training folder. A new item is created below the item you are looking at; choosing the place first saves moving it later.
- Create new (3 minutes). Under Sub items, press Create new. A list of the content types you may create here opens, in groups. Choose Folder. Mention the other way: the item menu in the tree has Create here, with the same list.
- The edit form (6 minutes). Point at:
- the buttons at the top: Send for publishing, Store draft and exit, Discard draft;
- the title line with the type and the language you edit, for example English (American);
- the field bar, one button per field; a red
*marks a required field; - one card per field, with its kind in the corner (Text, Rich text ...).
- The folder's fields (2 minutes): Name (required), Short name (used in menus and the tree when it is filled in), Summary and Description (rich text), Display sub items (whether the site lists the items in the folder below its text). Other installations may add fields such as Tags or Publish date.
- Publish (2 minutes). Press Send for publishing. The folder's page opens; the folder is now in the tree.
Common questions
What if I leave the form with Discard draft? For a new item, nothing is created at all.
Which types can I create? The list shows only the types your role may create in this place. A folder that accepts only some types (a gallery accepting only images, for example) shows fewer.
Why did my item get the short name in the tree? When Short name is filled in, it is used as the item's name in lists and the tree. That is the folder's naming rule on a standard installation.
Pitfalls
- Creating in the wrong place. Learners press Create new on the dashboard or the top of the tree. Ask them to read the path at the top of the page before they press it.
- Enter publishes. Pressing Enter in a one-line field is the same as pressing Send for publishing. Warn the class before they type the name.
- Missing permission. If Create new is missing or grayed out, the role may not create here. Fix the role on the training installation; do not hand out the administrator account.
Hands-on exercise
Use the training installation and your Editor training account.
- Open Content structure and then the folder Training that the trainer named.
- Check the path at the top of the page: it must end with Training.
- Under Sub items, press Create new and choose Folder.
- In Name, type your first name followed by
- course folder(for exampleAlex - course folder). Do not press Enter. - In Short name, type your first name only.
- In Summary, type one sentence about what this folder is for.
- Tick Display sub items (if your form has it), so the site lists the articles you add later.
- Look at the field bar at the top and click the button of Description: the form jumps to that field. Leave it empty.
- Press Send for publishing.
- On the folder's page, read the name in the title and the version line. Find your folder in the tree below Training.
- Press View on site and see your folder as visitors see it.
Expected result
- A folder named after the learner (shown with the short name, for example Alex) exists below Training, with Version 1.
- The tree shows the folder below Training.
- View on site shows the folder's summary on the public site.
- The trainer checks by opening Training on the projector: one folder per learner.
Quiz
- Where is a new item created when you press Create new under Sub items?
- What does a red
*next to a field mean? - Which button publishes the draft? A. Store draft and exit B. Discard draft C. Send for publishing D. Preview
- You fill in Name and press Enter. What happens?
- A learner pressed Discard draft on a new folder. Where is the folder now?
Answers
- Below the item whose page you are on (Creating and editing content).
- The field is required: the draft cannot be published while it is empty.
- C. Send for publishing.
- The form is sent as with Send for publishing (Creating and editing content).
- Nowhere: a new item left with Discard draft is not created at all.
Further reading
- Creating and editing content: every way to create an item.
- A tour of the administration: a folder edited step by step, with pictures.
- The content model and editing content: how types and fields are defined.
Related pages
- Module 3: Creating and editing content
- Editors 101: course overview
- Trainers: start here
- Free documentation: this page is free to copy, translate and improve under the GNU FDL 1.3.
Become an Exponential Partner
Partners share their information, provide funding, contribute back and develop the products with us, and that is how Exponential grows. A partner website and dashboard are planned for mid-2027: please become a partner today to speed up our growth rate and land new features faster.