Build a campaign page, start to finish
This is the one example on these pages that goes through every screen, on a copy of the Fit & Healthy site: a
Spring campaign page at /spring-2027 with the site's header and footer and a Hero. It took six screens and no code.
The second half builds the same page with templates.
Contents
- Create the layout
- Link the header and the footer
- Add the Hero
- Publish the layout
- Create the page
- Map the layout to the page
- The result
- The same page with templates
1. Create the layout
Layouts > Layouts > New layout. Choose the layout type Header / Main / Footer (layout_2, the type of every
Fit & Healthy layout: zones header, post_header, main, pre_footer, footer), give a Name and an
Identifier, and press Create layout.
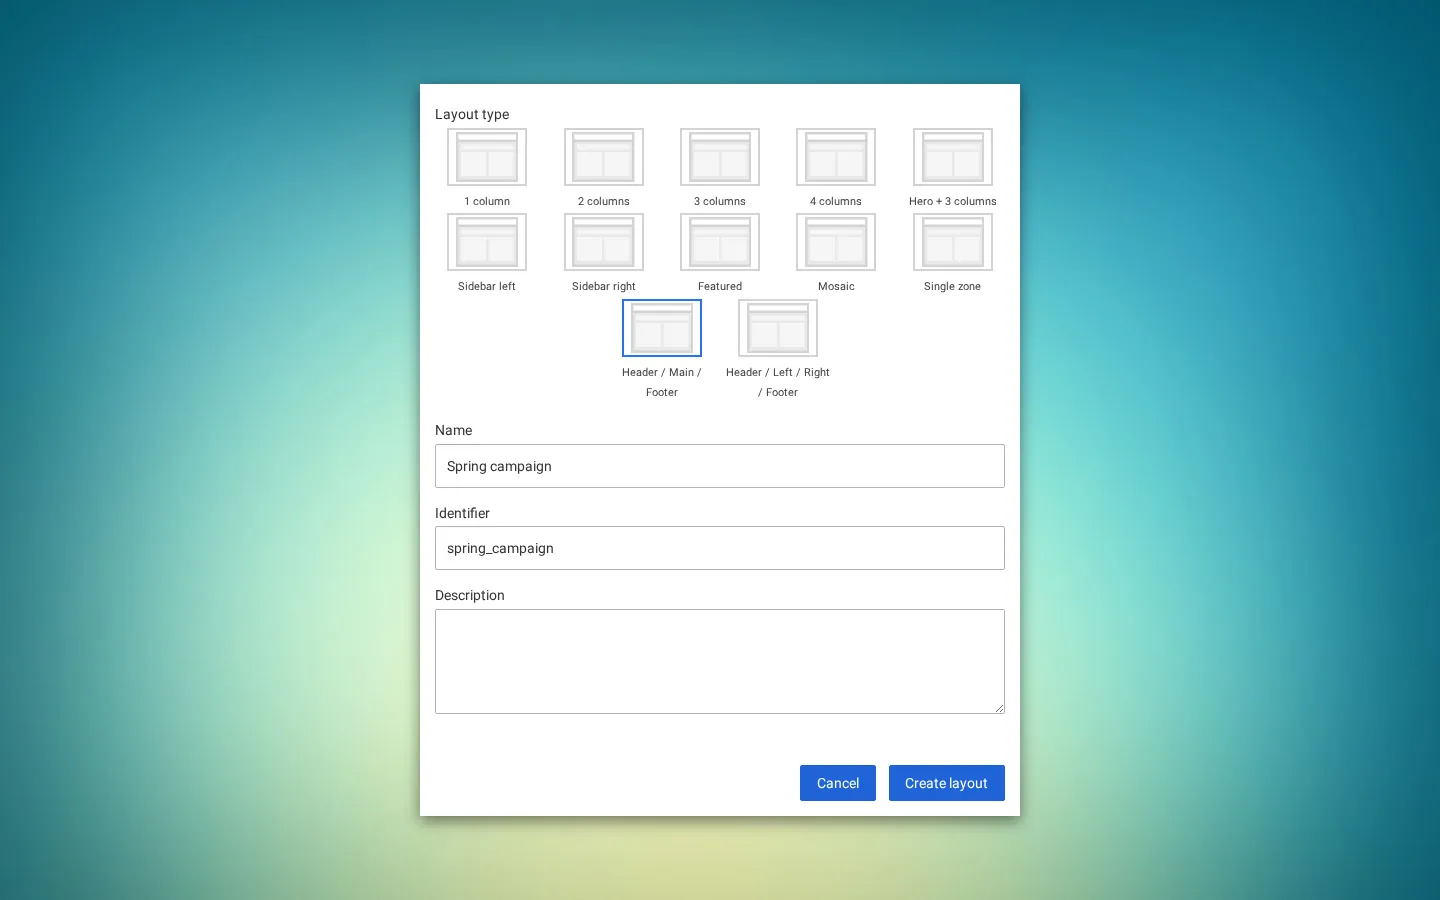
The editor opens with five empty zones.
2. Link the header and the footer
Press the linking button at the bottom left of the editor. Each zone gets Link zone.

Link zone on HEADER shows the shared layouts. Choose Header / Footer and press Select zone on its HEADER zone.

The editor returns with the header zone linked: it shows the shared blocks striped, as they are not this layout's own. Do the same for FOOTER.

3. Add the Hero
Open the block palette (+ at the top left), drag Hero (group Components) into MAIN, select it and fill its fields: Title, Content, Image URL, Image alt text, Link text, Link URL.

4. Publish the layout
Publish layout. The layout exists now, but no page uses it yet.
5. Create the page
In Content structure, open Fit & Healthy, Create new > Landing page, title Spring 2027, Send for
publishing. Its URL is /spring-2027.
6. Map the layout to the page
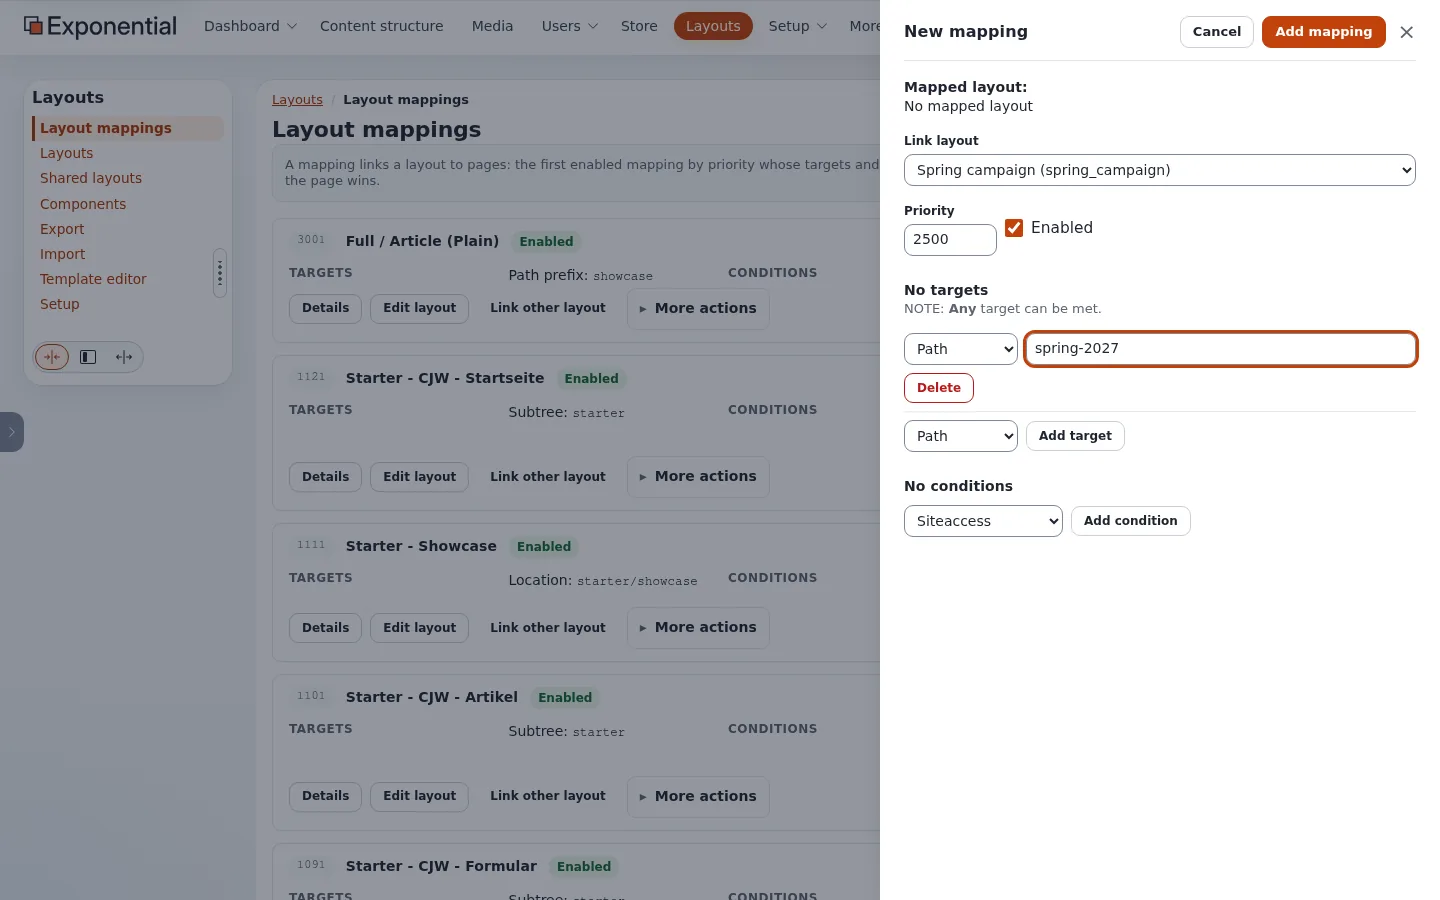
Layouts > Layout mappings > New mapping. Link layout: Spring campaign. Priority: higher than the mappings
that would otherwise take the page (2500 here). Target Path spring-2027, Add target. Add mapping.
7. The result

The header menu in this picture is the one of A header menu that follows the tree, which was active on the test copy.
The same page with templates
Without Layouts, the page's look comes from its full view template. The theme already shows how to give one page its
own full view: extension/sevenx_themes_media/settings/siteaccess/site/override.ini.append.php matches the tour page
(/exponential-live) by its remote ID, before the class overrides:
[node/view/full#showcase_s1_tour]
Source=node/view/full.tpl
MatchFile=node/view/full/showcase_s1_tour.tpl
Subdir=templates
Match[remote_id]=showcase-s1-tour
Priority=0
The same in your extension for the campaign page: a block like this in
extension/mysite/settings/siteaccess/site/override.ini.append.php with Match[remote_id]= the page's remote ID (shown
in the administration as Remote ID), and the template
extension/mysite/design/media/override/templates/node/view/full/spring_2027.tpl with the Hero markup and the page's
fields ($node.data_map.title, $node.data_map.full_intro, $node.data_map.image of the class Landing page). It
keeps everything in git; every change of text or picture is a deploy, and an editor cannot move or add blocks.
| Layouts editor | Template override | |
|---|---|---|
| Steps here | six screens, no code | an override block, a template, a deploy, a Template & content clear |
| Who changes the text later | an editor, in the Hero block | a developer, in the template |
| Reuse for the next campaign | copy the layout or change the Hero | copy the template and the override block |
| Header and footer | linked to the shared layout | the page layout of the design, as for every page |
Related pages
- Shared layouts and zone linking
- Which layout does a page get?
- Life-cycle examples
- Free documentation: this page is free to copy, translate and improve under the GNU FDL 1.3.
Become an Exponential Partner
Partners share their information, provide funding, contribute back and develop the products with us, and that is how Exponential grows. A partner website and dashboard are planned for mid-2027: please become a partner today to speed up our growth rate and land new features faster.