The setup wizard
A target is one site of your installation published to one git repository. The wizard in Setup > Static publishing > New target makes one in nine short steps; Settings on a target opens the same wizard with its settings. Nothing is built or published here: Save only writes the settings.
What you'll have at the end
A target with its settings in settings/override/staticcache.ini.append.php, ready to build.
Before you start
- The policy
staticpublish/setupwithout a Target limitation (Administrator has it). - A repository on the host. An empty one is fine. On GitHub: New repository, public for a free plan.
- For a token: the token stored in Setup > Secrets under a name of your choice (for GitHub a fine-grained token with Contents: Read and write on that repository). For a deploy key you need nothing yet.
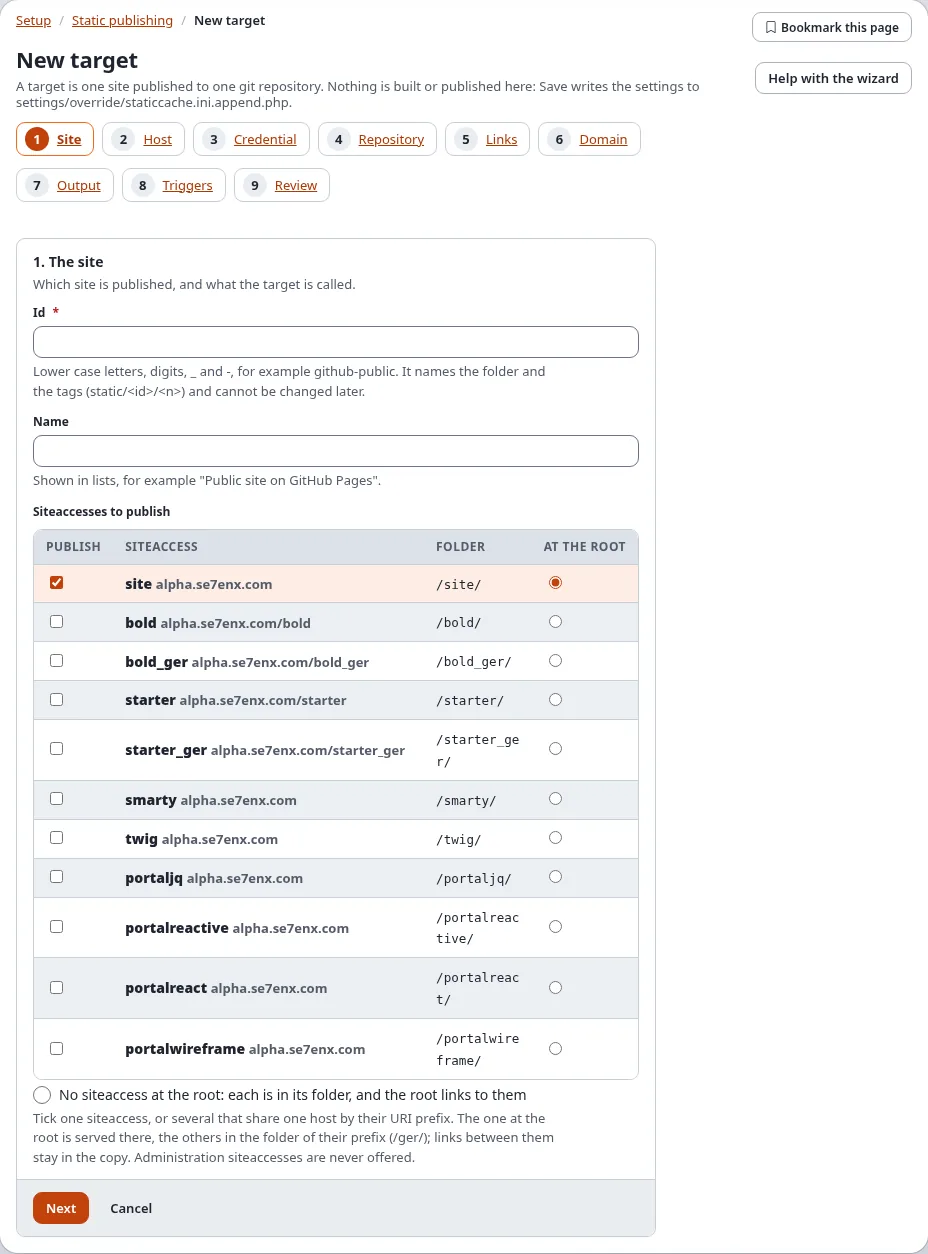
The step list at the top shows where you are; Back and Next move between steps, and a step can be opened from the list. Cancel, next to Next on every step, goes back to Setup > Static publishing without saving anything. Without JavaScript all steps show on one page.
1. The site
- Id: lower case letters, digits,
_and-, for examplegithub-public. It names the target's folder and its tags (static/<id>/<n>) and cannot be changed later. - Name: shown in lists.
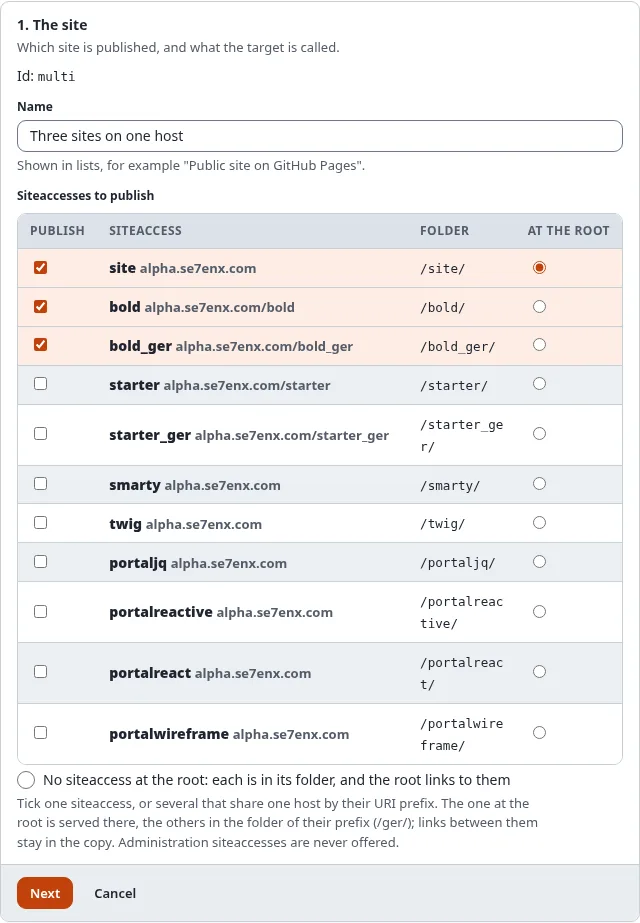
- Siteaccesses to publish: the front siteaccesses, each with its address and its folder (the URI prefix that
selects it,
/bold_ger/). Tick one, or several that share one host by their URI prefix; At the root chooses the one served at the root of the copy, the others go to their folders. With No siteaccess at the root each is in its folder and the root of the copy is a page that links to them. A target saved with one siteaccess opens with it ticked and at the root, and is saved asSiteAccess=as before; several are saved asSiteAccessList[]andDefaultSiteAccess. Administration and editing siteaccesses are never offered: a static copy is always what a visitor who is not signed in sees. The review, the dashboard and every page of a target list its siteaccesses with their folders (Static publishing for multisite installations).
2. The host
GitHub Pages or another git host (GitLab, Gitea, your own server). The box lists GitHub's limits: a site of up to 1 GB, a file of up to 100 MB, about 100 GB of traffic a month, a public repository on a free plan, and no shops (GitHub Pages limits and terms). Every push is checked against them first.
Below it the wizard says whether the GitHub integration can be used on this server. With it, and with a token or
a GitHub App, step 4 can create the repository and switch GitHub Pages on for you. Without it (no curl or openssl in
PHP, or GitHubAPI=disabled) publishing to the branch works all the same; you switch GitHub Pages on in the
repository's settings yourself.
3. Signing in to the repository
| Choice | For | What is stored |
|---|---|---|
| A token from Setup > Secrets | an https:// address | Credential=token:<name> |
| A deploy key made for this target | an SSH address ([email protected]:owner/repo.git) | Credential=sshkey:staticpublish.<id>.deploy_key |
| A GitHub App | an https:// address on GitHub | Credential=app:<installation id> |
| None | the server signs in by itself, or the repository is on this server | Credential=none |
Only the name is stored with the target; the token or key stays in Setup > Secrets and never appears in a log or a report. With a deploy key, Save opens the target's Deploy key page, where Make the key creates it and shows the public half to add to the repository (Deploy keys). A GitHub App needs its installation id; the App itself is set up once for the installation. Which one to choose: Connect to GitHub: token, deploy key or GitHub App.
Only a token or a GitHub App can use GitHub's API, so only they unlock the GitHub steps below. A deploy key pushes.
4. The repository
- Git address: the repository's address, never with a password or token in it.
- Branch:
gh-pages, ormainwith the folderdocs. - Folder: the root of the branch or
/docs(GitHub Pages serves one of the two). - How GitHub Pages receives the build: from the branch (the default) or by a GitHub Actions workflow, which the build writes for you (Branch or GitHub Actions).
On GitHub: once the target is saved with a GitHub address and a token or GitHub App, this step has Set up on GitHub. It creates the repository when it is missing and you ticked Create the repository if it does not exist (public, or private, which GitHub Pages serves only on a paid plan), switches GitHub Pages on from the branch and folder or from GitHub Actions, and sets your own domain and HTTPS. It asks Verify it's you and lists each step with its result. It works with the saved settings: save changes first. A new repository has no branch yet, so GitHub Pages is switched on after the first publish: press Set up on GitHub again then.
5. Links and base path
A GitHub project site lives below /<repository>/ (https://owner.github.io/my-site/). Relative links work
there and below any other path, so they are the default. Below a base path writes every link starting with the
base path. The box shows, as you type, how a link from the page /news/ to /about-us/team will be written.
Public address is the address of the published site; the sitemap and the canonical links need it.
6. Your own domain
Optional: www.example.com. It is written to the file CNAME, and the site is then served at the root of the
domain, so leave the base path empty. Point the domain's DNS at the host as it explains; HTTPS can take a while.
Check the DNS looks the domain up and says whether it points at GitHub Pages: a subdomain needs a CNAME record to
<owner>.github.io, an apex domain the four A records of GitHub Pages. When something is missing or wrong it lists
the records to set at the provider of the domain. Details: Use your own domain.
7. What the build holds
- Files: what the pages name, and every image of published content (the default), or only what the pages name.
- Extras:
.nojekyll(needed on GitHub Pages),404.html,robots.txt,sitemap.xml. The manifest is always written. - Post-processing: debug output, form tokens, session ids and nonces are always taken out. A page that still carries one is refused, and nothing is published.
- Search page and forms, most pages, pages and sections to leave out, and where the pages are fetched from and where links to the live site go.
- Remove links to pages the copy does not hold and Remove links into the administration (
OutsideLinks,AdminLinks, both No by default): with Yes such a link stays in place with its text, grayed out and without an address, instead of leading to the live site (Links and base path).
8. When it is published
Always by hand here and on the console; besides that, when content is published and on a schedule, both run by the
cronjob part staticpublish, with notifications and a webhook afterwards (Publish automatically).
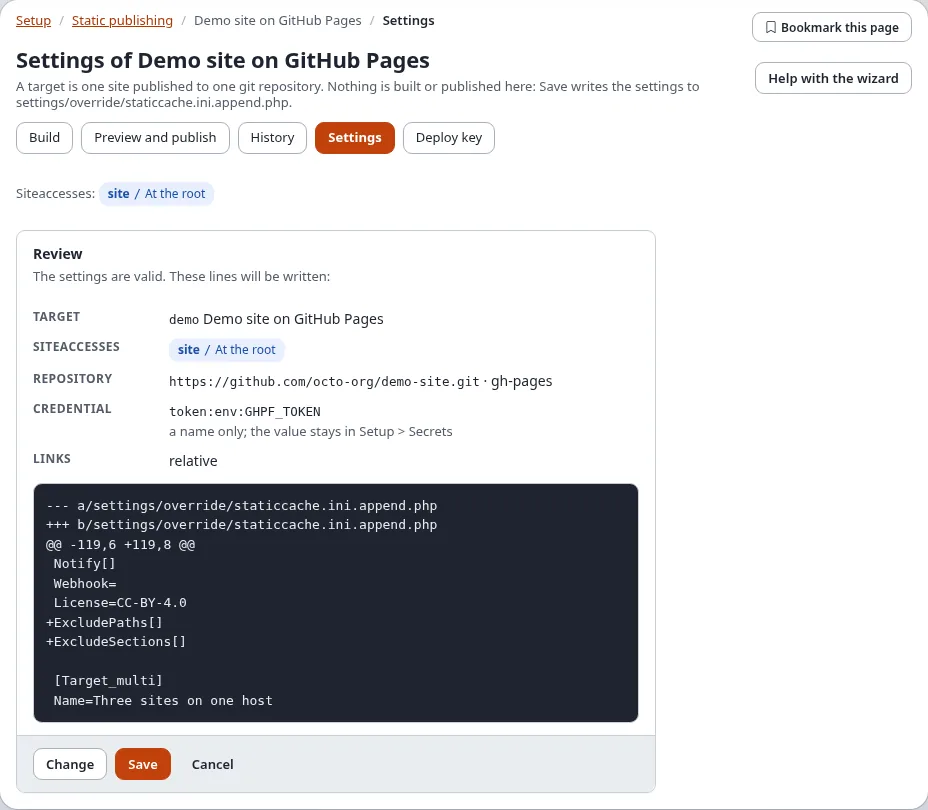
9. Review and save
Review (next to Cancel) checks every setting and shows the lines that will be written. Fix what it lists and press Review again. When static publishing is still switched off, Switch static publishing on is ticked for you. Save writes the settings (with a backup of the file and an entry in the audit log) and asks Verify it's you. Then the target's Build page opens.